Custom Data Augmentation in Keras
 View source on GitHub
Out of the box, Keras provides a lot of good data augmentation techniques, as you might have seen in the previous tutorial. However, it is often necessary to implement our own preprocessing function (our own ImageDataGenerator) if we want to add specific types of data augmentation. One such case is handling color: Keras provides only a way of randomly changing the brightness, but no way of varying the color in our augmented dataset.
In this tutorial, we will implement a method to slightly scaling each color channel, thereby varying the color of the output image.
If we look at the Keras documentation for the ImageDataGenerator class, we see that we can plug in our own preprocessing function by simply specifying a callback with the parameter preprocessing_function. This callback will be executed for every image after all other standard Keras data augmentation has been performed. In that callback we can then further modify the image with our own routine.
Setup
This is a good point to look at the Colab notebook and follow along. This allows you to play around with the parameters and explore what we discuss here in more detail.
Click the link on the top of the post to either open the notebook in Google Colab or download it to run on your machine.
As in the previous tutorial, we start by defining all the imports we need.
import numpy as np
import tensorflow as tf
from tensorflow.keras.preprocessing.image import load_img, img_to_array
from tensorflow.keras.preprocessing.image import ImageDataGenerator
import matplotlib.pyplot as plt
import requests
import random
Next we download a sample image from the Github repository, load it into memory and display it as a reference. Feel free to change the image to make the tutorial more personalized!
url = 'https://github.com/dufourpascal/stepupai/raw/master/tutorials/data_augmentation/image_town.jpg'
r = requests.get(url, allow_redirects=True)
open('image.jpg', 'wb').write(r.content)

image = load_img('image.jpg')
image = img_to_array(image).astype(int)
data = np.expand_dims(image, 0)
plt.axis('off')
plt.imshow(data[0])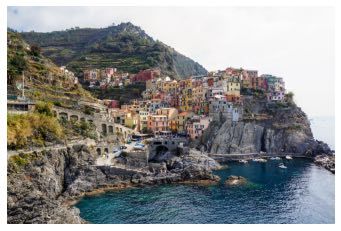
To simplify visualization, we create a helper function that generates the augmented data and plots it in a grid. The computation and use of the image aspect ratio is to have a clean grid of images without padding in-between.
def plot_augmentation(datagen, data, n_rows=1, n_cols=5):
  n_images = n_rows * n_cols
  gen_flow = datagen.flow(data)

  aspect_ratio = data.shape[1] / data.shape[2]
  base_size = 2
  fig_size = (n_cols*base_size/aspect_ratio, n_rows*base_size)
  fig = plt.figure(figsize=fig_size)

  for image_index in range(n_images):
    image = next(gen_flow)
    plt.subplot(n_rows, n_cols, image_index+1)
    plt.axis('off')
    plt.imshow(image[0], vmin=0, vmax=255)
  fig.tight_layout(pad=0.0)
Adding a Callback vs. Extending ImageDataGenerator
There are two options of getting our own preprocessing function executed in the data augmentation pipeline, simply through a callback, or by extending ImageDataGenerator.
Option 1: Specifying preprocessing_function parameter on ImageDataGenerator
The quickest and simplest solution. You would call it like this: ImageDataGenerator(preprocessing_function=my_custom_function) and simpy implement my_custom_function(image_input).
The downside is that the callback we specify only takes one input: an image, and there is no easy way to specify the augmentation parameters.
Option 2: Extending ImageDataGenerator
By defining a class that inherits from ImageDataGenerator, we can nicely define the arguments to specify the ranges of our own preprocessing function. Furthermore, if in the future we want to add more than just one preprocessing function, extending our own class will be simpler than managing multiple functions.
Let's start with a skeleton of our CustomDataGenerator:
class CustomDataGenerator(ImageDataGenerator):
  def __init__(self,
               red_range=None,
               green_range=None,
               blue_range=None,
               **kwargs):
    '''
    Custom image data generator.
    Behaves like ImageDataGenerator, but allows color augmentation.
    '''
   	# TODO: IMPLEMENT

  def augment_color(self, image):
    '''Takes an input image and returns a modified version of it'''

    # TODO: IMPLEMENT

    return image
As you can see, we extend ImageDataGenerator and specify our own augmentation parameters in the __init__(). We might want to separately specify different strength of augmentation for each of the RGB channels. We set the default to None, which means that no augmentation should be done by default on that channel.
Now let's implement the __init__() method. We want to forward all parameters to the superclass and store our custom parameters red_range green_range and blue_range as properties so we later have access to them in the method augment_color().
Furthermore, we want to specify that augment_color() should be called as a preprocessing function after standard data augmentation was performed.
  def __init__(self,
               red_range=None,
               green_range=None,
               blue_range=None,
               **kwargs):
    '''
    Custom image data generator.
    Behaves like ImageDataGenerator, but allows color augmentation.
    '''
    super().__init__(
        preprocessing_function=self.augment_color,
        **kwargs)

    self.red_range = red_range
    self.green_range = green_range
    self.blue_range = blue_range
At this point we can implement augment_color():
  def augment_color(self, image):
    '''Takes an input image and returns a modified version of it'''
    channel_ranges = (self.red_range, self.green_range, self.blue_range)
    for channel, channel_range in enumerate(channel_ranges):
      if not channel_range:
        continue  # no range set, so don't change that channel
      scale = random.uniform(channel_range[0], channel_range[1])
      image[:, :, channel] = image[:, :, channel] * scale

    image = np.clip(image, 0, 255)
    return image
As you can see, augment_color() will take a single image as input, modify it, and return it.
For each channel, we first check if it is None and in that case we do not modify that channel.
If we do have a range for a chanel, we compute a random scaling factor in the specified range, then multiply all values in that channel by that factor.
Before returning the result, we clip the image to the standard interval of [0, 255].
Results
To visualize the results, we create a CustomDataGenerator object and specify the parameters, then call plot_augmentation().
datagen = CustomDataGenerator(red_range=(0.8, 1.2),
                              green_range=(0.8, 1.2),
                              blue_range=(0.8, 1.2),
                              dtype=int)
datagen.fit(data)
plot_augmentation(datagen, data, n_rows=2, n_cols=6)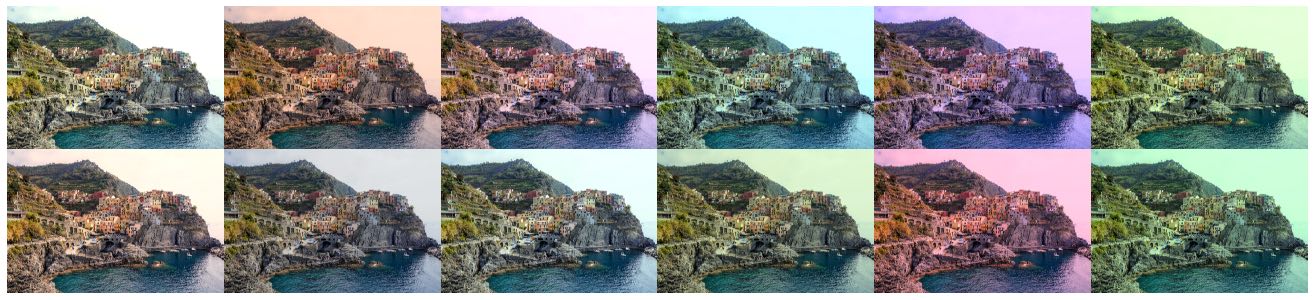
Note you can play around with the parameters, e.g. turn on and off augmentation on individual channels, or add other augmentation parameters from ImageDataGenerator!


Conclusion
There you have it! Adding our own custom ImageDataGenerator function in the Keras data augmentation pipeline is simple and only requires a few lines of code. By extending ImageDataGenerator, we can even have the expected behavior of passing the augmentation parameters in the constructor as we are used to from Keras. You could use this to implement image crop or extend it to perform color augmentation that work with the HSV color space.
If you want to add two or more preprocessing functions, you would create a single callback that we pass in preprocessing_function. In that callback we can then then call the other preprocessing functions. Like this we could chain multiple preprocessing functions and pass the output of one as input to the next one.
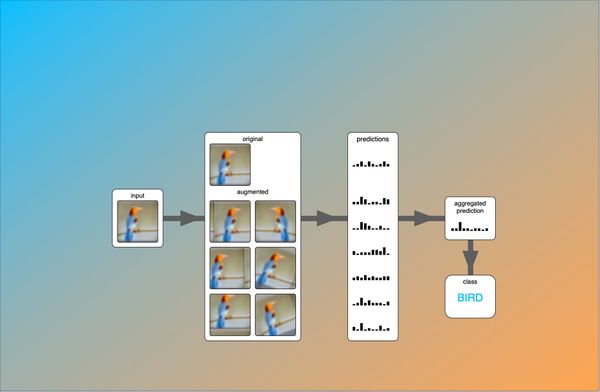
In the next tutorial you will learn how to train a convolutional neural network with image data augmentation. I also wrote a blog post about test-time data augmentation (TTA), where data augmentation is applied during inference to improve a model's prediction.